
Building a house extension is one of the most effective ways to create more space without moving home. Whether you want a larger kitchen, an extra bedroom, a home office or a bigger living area, a well-planned extension can improve both your home and its long-term value.
However, building an extension involves much more than constructing a new room. You need to consider design, planning permission, building regulations, structural work, drainage, insulation, costs and the construction programme.
This guide explains how to build a house extension in the UK, from the first idea through to completion.
How Do You Build a House Extension?
To build a house extension, you generally need to:
- Decide what type of extension you need and how much space you want to add.
- Check whether planning permission is required or whether the project falls under permitted development.
- Arrange suitable drawings and structural calculations.
- Check Building Regulations requirements and obtain building control approval.
- Consider Party Wall requirements if the extension affects adjoining properties.
- Obtain detailed quotations from suitable builders.
- Prepare the site and complete the foundations.
- Construct the walls, floors and roof.
- Install windows, doors, insulation, plumbing and electrics.
- Complete the internal finishes and connect the extension to the existing house.
- Arrange the necessary inspections and completion documentation.
The exact process depends on the size, location and design of your extension.
Step 1: Decide Why You Need an Extension
Before thinking about materials or builders, decide exactly what you want the extension to achieve.
For example, you might want to:
- Create a larger kitchen and dining area for everyday family use.
- Add a bedroom and bathroom to accommodate a growing family.
- Create a dedicated home office away from the main living areas.
- Increase your living space without moving to a larger property.
- Improve the connection between your house and garden.
Understanding the purpose of the extension helps determine its size, layout, position and specification.
Step 2: Choose the Right Type of Extension
The shape and position of your property will influence which type of extension works best.
Rear Extension
A rear extension usually extends into the garden and can create valuable additional living space.
It is particularly popular for creating open-plan kitchens, dining areas and family rooms.
Side Return Extension
A side return extension uses the narrow space alongside a house and is common on terraced and semi-detached properties.
It can make a relatively small property feel significantly larger without extending too far into the garden.
Wraparound Extension
A wraparound extension combines a rear and side extension to create a larger increase in floor space.
This can provide considerable flexibility, although it usually involves more structural work and a higher budget.
Double-Storey Extension
A double-storey extension adds space on two floors, making it suitable when you need additional bedrooms, bathrooms or living areas.
Although the initial cost is higher, adding space over two floors can make efficient use of the available footprint.
Step 3: Check Planning Permission
One of the first legal checks is whether your proposed extension needs planning permission.
Some house extensions may qualify for permitted development rights, provided they meet specific requirements relating to dimensions, height, location and design.
Other extensions require a planning application.
You should also check whether your property is listed, located within a conservation area or affected by other planning restrictions, as these circumstances can change what is permitted.
Do not assume that an extension is permitted simply because a neighbour has built something similar. The rules can vary between properties.
Step 4: Get Professional Drawings
Once you know what you want to build, you will need accurate drawings.
Depending on the project, these can include:
- Existing floor plans showing the current property.
- Proposed floor plans showing the new extension.
- Elevation drawings showing the external appearance.
- Site plans showing the extension’s position.
- Construction details showing how the new structure will be built.
- Structural information for beams, walls, foundations and other load-bearing elements.
Good drawings help you obtain approvals, compare quotations and give your builder clear instructions.
Step 5: Check Building Regulations
Planning permission and Building Regulations are separate requirements.
Building Regulations focus on whether the extension is constructed safely and meets required standards.
They cover areas such as:
- Structural stability.
- Fire safety.
- Thermal insulation and energy efficiency.
- Ventilation.
- Drainage.
- Electrical safety.
- Damp protection.
- Access and other technical requirements.
Building control will normally need to inspect relevant stages of the work before issuing completion documentation.
Step 6: Consider Party Wall Requirements
If you are building close to a boundary or carrying out work that affects a shared wall or structure, the Party Wall etc. Act 1996 may apply.
This is particularly relevant for many terraced and semi-detached homes.
You may need to serve formal notices on adjoining owners before certain works begin.
A Party Wall process is separate from planning permission and Building Regulations, so it should be considered early rather than after construction has started.
Step 7: Check Drainage and Services
Before excavation begins, establish where existing services and drainage systems are located.
An extension may affect:
- Existing drains.
- Soil pipes.
- Water supplies.
- Gas services.
- Electrical cables.
- External manholes.
- Surface water drainage.
If drainage needs to be moved or protected, this can affect both the design and the overall cost.
This is one reason why proper surveys and site investigation are important before construction starts.
Step 8: Set a Realistic Extension Budget
Before appointing a builder, establish how much you can realistically spend.
The cost depends on factors such as:
- The size of the extension.
- The type of foundations required.
- The structural design.
- The quality of materials and finishes.
- The number and size of windows and doors.
- Plumbing and electrical requirements.
- Kitchen or bathroom installations.
- Roof design.
- Ground conditions.
- Access to the property.
- Your location and local labour costs.
You should also keep a contingency budget because unforeseen work can arise once construction begins.
For a broader guide to current costs, see our article on how much a house extension costs in the UK.
Step 9: Choose the Right Builder
Choosing a suitable contractor is one of the most important decisions you will make.
Do not select a builder based only on the cheapest quotation.
Instead, consider:
- Whether they have relevant extension experience.
- Whether they can provide examples of similar completed projects.
- Whether the quotation clearly explains what is included.
- Whether they understand the drawings and specification.
- Whether they can provide appropriate insurance details.
- Whether their proposed programme is realistic.
- Whether they communicate clearly and professionally.
A detailed quotation makes it easier to compare different builders and reduces the risk of unexpected costs later.
Step 10: Prepare the Site
Once approvals and contracts are in place, construction can begin.
The builder will normally start by preparing the site.
This may involve:
- Setting up safe access to the property.
- Protecting areas of the existing house.
- Removing vegetation or other obstructions.
- Establishing temporary services where necessary.
- Removing sections of the existing structure.
- Marking out the extension according to the approved drawings.
Good site preparation helps keep the construction process organised and safe.
Step 11: Build the Foundations
Foundations transfer the weight of the extension safely into the ground.
The required foundation type and depth depend on factors such as ground conditions, the building design, nearby trees and the relationship with the existing property.
The builder will excavate the foundations and complete the necessary inspections before continuing with the structure.
It is important not to guess foundation requirements because unsuitable foundations can lead to serious structural problems.
Step 12: Construct the Extension
After the foundations are completed, the main structure can start to take shape.
The construction may include:
- Building the substructure and floor.
- Constructing the external walls.
- Installing structural steel where required.
- Building the roof.
- Installing windows and external doors.
- Connecting the new structure to the existing house.
At this stage, the extension begins to look like a finished part of the property rather than a construction site.
Step 13: Install Insulation, Plumbing and Electrics
Once the main structure is in place, the internal services can be installed.
Electrical work may include:
- Lighting.
- Socket outlets.
- Appliance connections.
- External lighting.
- Heating controls.
Plumbing may be required for kitchens, bathrooms, utility rooms or other fixtures.
The extension should also have appropriate insulation and ventilation to help create a comfortable, energy-efficient space.
Step 14: Connect the Extension to the Existing House
One of the most important stages is creating a proper connection between the new extension and the original building.
This can involve removing part of an existing external wall and installing structural steel or other support.
The connection needs to be properly designed and constructed so that the new and existing structures work safely together.
It should also address issues such as:
- Damp protection.
- Insulation.
- Weatherproofing.
- Structural movement.
- Thermal bridging.
- Fire protection where applicable.
Step 15: Complete the Internal Finishes
After the main construction and first-fix services are complete, the internal finishes can begin.
These may include:
- Plastering and decorating.
- Flooring.
- Internal doors.
- Skirting and architraves.
- Kitchen installation.
- Bathroom installation.
- Lighting and electrical accessories.
- Joinery and fitted storage.
The final specification will depend on how you intend to use the new space.
Step 16: Complete the External Works
The outside of the extension also needs to be finished properly.
This may include:
- Brickwork or external cladding.
- Rendering.
- Roof finishes.
- Gutters and rainwater pipes.
- Patio or paving.
- Drainage connections.
- Garden reinstatement.
A well-designed extension should look like a natural part of the original property rather than an addition that feels disconnected.
How Long Does It Take to Build a House Extension?

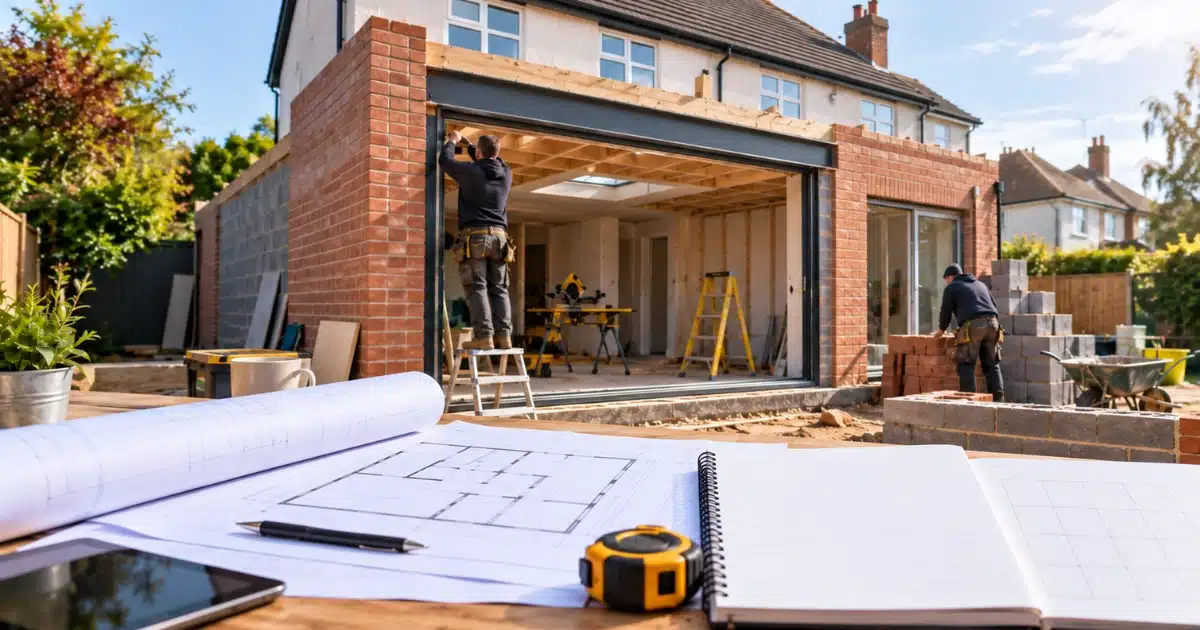
The construction period depends on the size and complexity of the project.
As a general guide, a straightforward single-storey extension may take around 10–16 weeks to build, although larger or more complex projects can take considerably longer.
The complete project takes longer because you also need to allow time for:
- Design and surveys.
- Planning permission, if required.
- Building control arrangements.
- Party Wall procedures, where applicable.
- Structural calculations.
- Contractor selection.
- Material ordering.
Therefore, you should plan the entire project rather than focusing only on the physical construction period.
What Can Make an Extension Take Longer?
Several issues can delay an extension project.
These can include:
- Planning complications can delay the start of construction.
- Unexpected ground conditions can require additional foundation work.
- Moving drains or services can add extra work.
- Structural changes to the existing house can increase the programme.
- Bespoke materials can take longer to manufacture or deliver.
- Changes made after construction has started can disrupt the agreed programme.
- Poor weather can affect some external construction activities.
Good planning before work starts can reduce many avoidable delays.
How Much Does It Cost to Build a House Extension?
There is no single price because every extension is different.
For a typical UK project, a broad starting range can be around £30,000 to £100,000+, while larger, more complex or high-specification extensions can cost considerably more.
The cost can increase significantly when you add:
- A new kitchen.
- A bathroom or WC.
- Large sliding or bi-fold doors.
- Structural steel.
- Bespoke glazing.
- Premium finishes.
- Complex foundations.
- Extensive drainage work.
- High-end joinery.
For this reason, it is better to obtain a detailed quotation based on your actual drawings and specification rather than relying on a general cost-per-metre figure.
How to Keep Your Extension Project on Budget
You can reduce the risk of unexpected costs by making important decisions before construction begins.
- Finalise the layout and specification before work starts wherever possible.
- Keep a contingency budget for unexpected construction issues.
- Obtain detailed quotations that clearly state what is included and excluded.
- Avoid making major design changes after construction has started.
- Choose materials based on both quality and long-term practicality.
- Compare quotations on the complete scope of work rather than headline price alone.
Common Mistakes to Avoid When Building an Extension
Starting Without a Clear Design
Building without detailed plans can lead to mistakes, changes and additional costs.
Choosing a Builder Based Only on Price
The cheapest quotation may not provide the same specification, workmanship or level of service as a more detailed proposal.
Forgetting About Drainage
Existing drainage can have a major effect on the design and construction process, particularly for rear and side extensions.
Underestimating the Total Cost
The building work is only part of the overall project. Professional fees, approvals, finishes and contingency should also be considered.
Making Changes During Construction
Late changes can increase costs and delay the programme, particularly when they affect structural work or services.
Ignoring How the Extension Connects to the Existing Home
The extension should be designed as part of the property rather than as a separate structure added onto it.
Is Building a House Extension Worth It?
A house extension can be worthwhile when it provides the space your household needs while remaining financially sensible for the property and local area.
It can give you:
- More usable living space.
- A larger kitchen or dining area.
- Additional bedrooms or bathrooms.
- Better connection with the garden.
- Greater flexibility as your needs change.
- Potentially increased property value.
However, the financial return is not guaranteed. Before starting, compare the expected cost of the extension with local property values and the amount of additional space you actually need.
Final Words
Learning how to build a house extension is about understanding the complete process, not simply the construction stage. From choosing the right design and checking planning requirements to completing foundations, structural work, services and finishes, every stage needs careful planning.
A well-designed and professionally built extension can give your London home valuable additional space while making better use of the property you already own.
If you are considering an extension, JP Refurbishment London Ltd can help with the planning, construction and finishing stages of your refurbishment project.